Building the Asteroids Template
From Shoot Em Up Kit
Templates
This tutorial explains how we built the Asteroids template. The template is included ready-made in the Shoot 'em Up Kit and you can create a new game using it as a starting point.
Build the Game
Create a new Empty Project
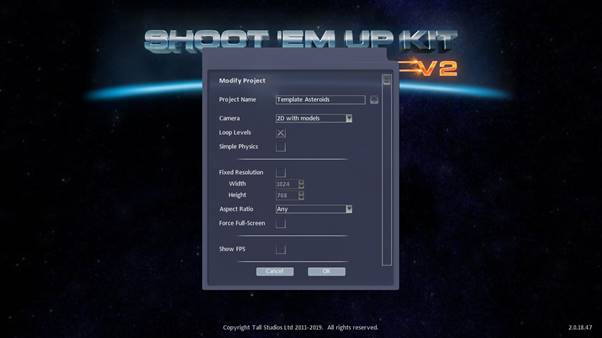
Give the project a name.
Select 2D with models
Click the OK button to create the project.
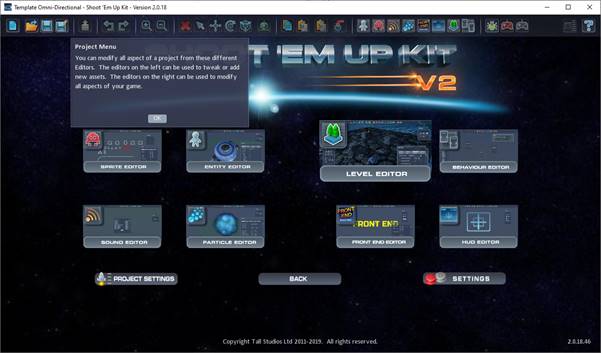
Select the Level Editor
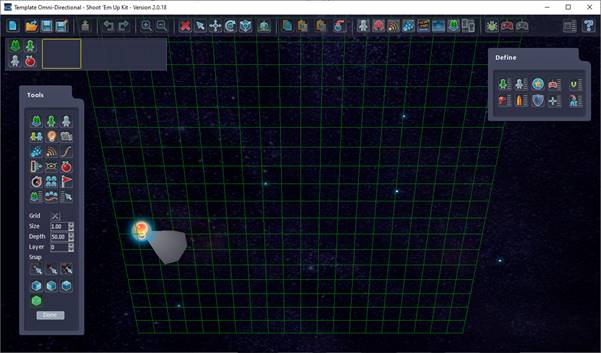
The scene is empty except for a single directional light. A grid to help visualise the area is shown. Because we selected to create a 2D game the objects we place will be placed on this plane by default.
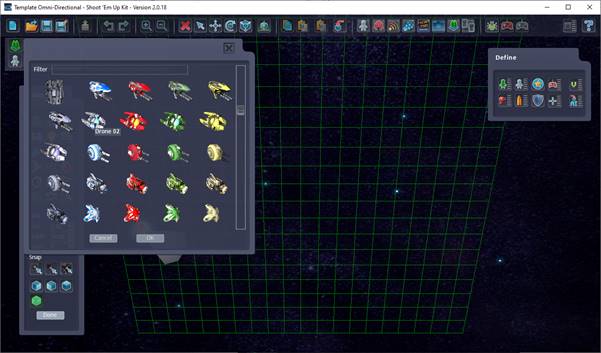
The first thing we will add to the scene is a ship for the player to control. Click on the ![]() Player button and select Drone 02.
Player button and select Drone 02.
Then place the ship somewhere near the centre of the screen.
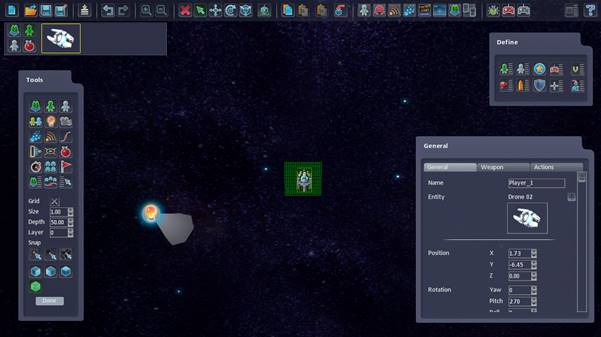
Click on the Player ship and the Properties window will open. Scroll down the properties window until you see the Player Definition, Input Definition and Movement Definition.
Definitions are a small collection of properties that you can tweak for you project. The Player Definition, for example, has properties such as the number of lives, Health, and how long the player is invulnerable at the start of a game.
You can apply the same Definitions to multiple items in the scene. For example, you can have an NPC Definition shared by all the NPCs in a formation so that each NPC has the same health – and tweaking the NPC definition will affect all the NPCs which are using it.
For making an asteroid shooter we need to change the Input Definition, which specifies what action each input button or axis performs. We also need to change the Movement Definition to use rotational movement. And finally, we will change the Player Definition to allow 2 seconds of invulnerability after the player spawns or respawns into the level.
Click on the Input Definition, which is currently set to Horizontal + Fire. Select Rotate Yaw + Fw & Bk.
Click on the Movement Definition and select Rotation from the list.
Click on the Player Definition and select Invulnerable 2s from the list.
In the classic Asteroids game, the ship can only move forwards. It uses a thruster to set momentum and keep the ship moving. We’ll use a simplified version for this tutorial.
We will modify the Rotate Yaw + Fw & Bk Input Definition to modify some of the controls. To do this, click the arrow next to the Input definition to go straight to the definition. Alternatively, you can open the Input Definition list from the Define menu and select the Default definition.
![]()
Select the Left Analog -Y property that is currently set to Move Backwards. Change this to Unused so that the ship can no longer move backwards. Click the OK button and close the definition list.
The ship currently rotates quite slowly so we will alter the movement definition to speed up the rotation. With the Player selected, and the General properties window open, go to the Movement Definition and click the arrow to go straight to the Rotate movement definition.
![]()
Increase the Max Rotation Speed to 4.
Active Area
We want to limit the player to an area of the map so that we can generate asteroids outside of this area and let them move across as a hazard to the player.
Click on the ![]() Trigger icon on the Tools pane and place it next to the player
Trigger icon on the Tools pane and place it next to the player
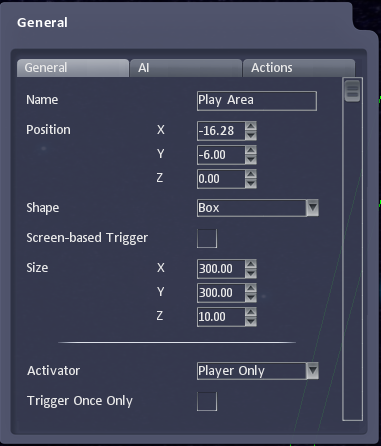
Set the Name to Play Area
Set the Shape to Box . Set the Size to X: 300 and Y: 300.
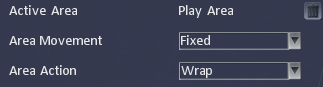
To limit the player’s movement to the active area we need to select the player again. In the properties window set the Active Area to Play Area and the Area Action to Wrap.
Creating Asteroids
Asteroids will be created using an NPC Generator. An NPC Generator can spawn non-player characters (NPCs), which is this game will be asteroids. The asteroids will be spawned at NPC Generator nodes that we will place around the edge of the active area.
Click on the ![]() NPC Generator button on the Tools pane.
NPC Generator button on the Tools pane.
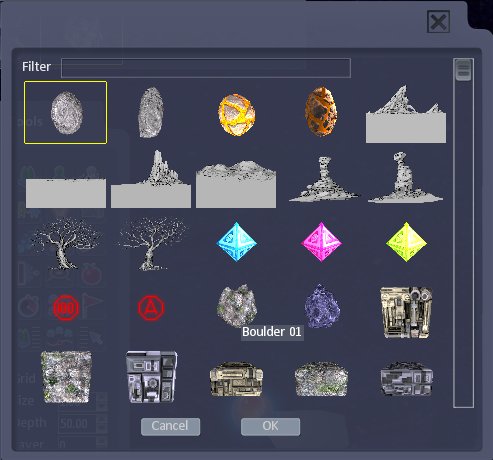
Select Boulder 01 and double click it or press the OK button.
Place a few nodes around the outside of the play area by clicking on the map. Three or four is probably enough as their direction will be randomised.
You can zoom the map in or out using the mouse wheel to help visualise placement.
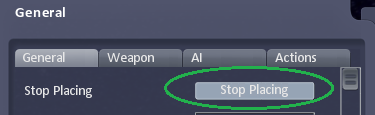
Once you’ve placed a few nodes click the Stop Placing button or press Esc.
In the template game we have created three nodes all along the right-hand side of the playing area. Because the directions will be randomised, and the active area will wrap items from one side of the map to the other, it is alright to just place the NPC Generator nodes along one edge.
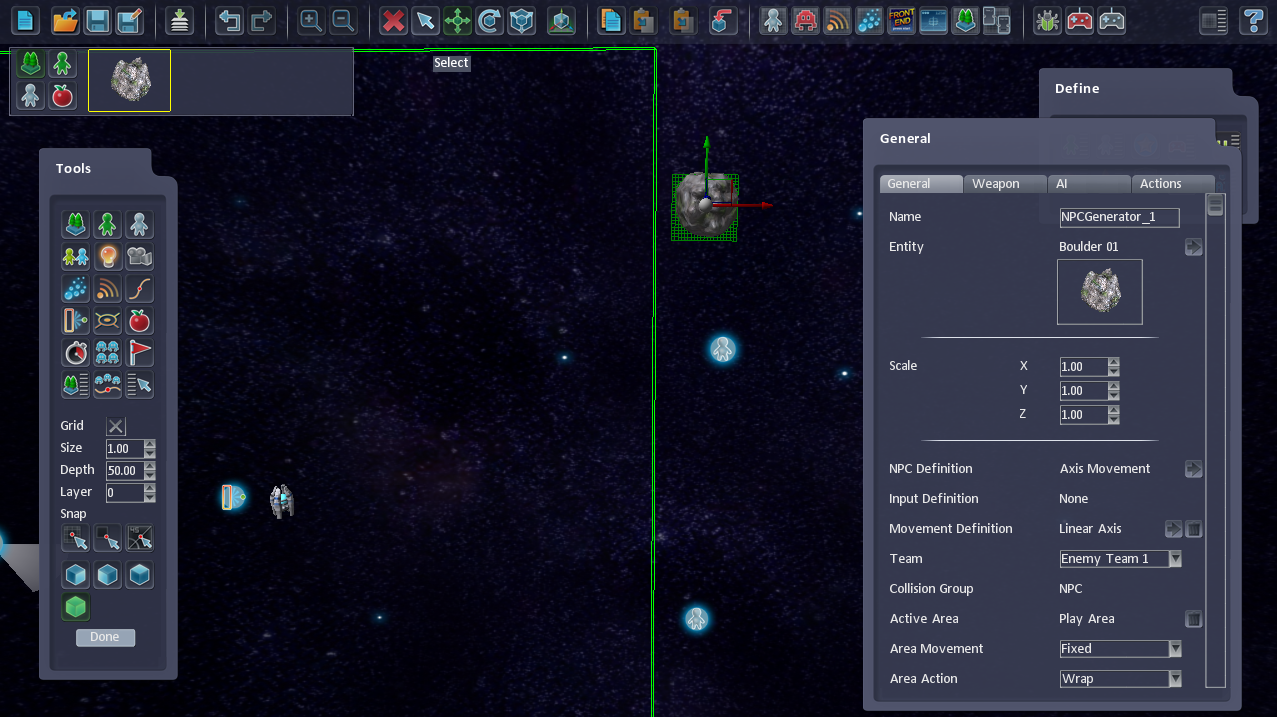
We will now set-up the NPC Generator to spawn asteroids at the rate we want and to use the active area we created in a previous step.
First, we will set Movement Definition to Linear Axis. Open the Linear Axis definition and change movement to Linear Proportional (to do this, click the arrow next to the Movement definition in the properties window or open the Movement Definition list from the Define menu and select the Linear Axis definition). This will allow the asteroids to move in full 360 degrees. AI uses virtual input to steer the asteroid just like the player does to steer the ship. If we use proportional input, then the AI’s virtual joystick can move in fine detail and the asteroid can move in many directions. If we use linear directions, then the virtual joystick will be limited to extreme X and/or Y which would limit the asteroid to 8 directions.
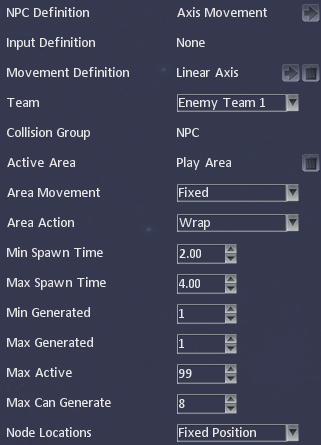
Set Active Area to Play Area, which is the Trigger/Active area we created earlier.
Set Area Action to Wrap. This will allow the asteroids to wrap from one side of the active area to the other.
Set the Min Spawn Time to 2 and the Max Spawn Time to 4. This will spawn each new asteroid at a random time between 2 and 4 seconds.
Set the Max Can Generate to 8. This will restrict the NPC Generator to spawning 8 asteroids. Feel free to play around with this number. Small values make the game easier and greater values will make the game very chaotic.
Asteroid AI Behaviours
Click the AI tab so that we can set the AI behaviours for the asteroid. This will be limited to moving in a randomised direction and rotating to provide a visual effect.
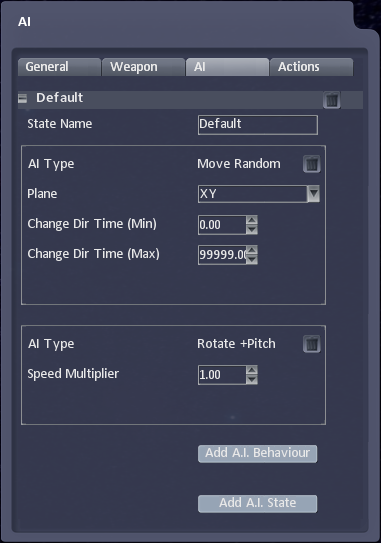
Change the AI Type to Move Random. Several new options will appear.
Set the Plane to XY
Set Change Dir Time (Min) to 99999 and Change Dir Time (Max) to 99999. This will prevent the asteroids from changing direction. They will change direction after 99,999 seconds but as this is over 1 day we can safely assume no-one will see this.
Add another AI Type by clicking the Add A.I. Behaviour button. We will add some rotation to the asteroids to make them more interesting.
Set the AI Type to Rotate +Pitch.
Leave the Speed Multiplier property at 1.0 as this is a good speed for the rotation effect.
Keeping the NPCs (Asteroids) active
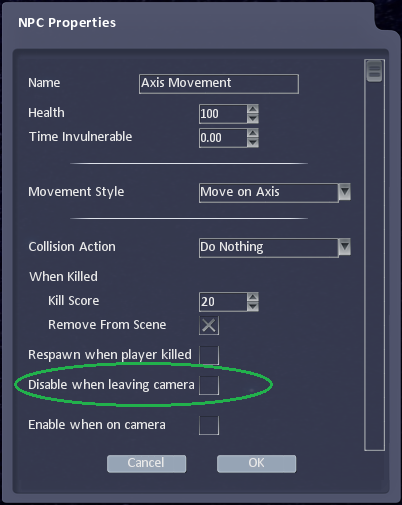
With any NPC Generator node active, go to the General pane and find the NPC Definition. Click the button next to Axis Movement to go to the NPC Definition.
Uncheck the option Disable when leaving Camera to prevent the asteroids from being removed when they leave the screen. We want them to stay active so that wrap around the playing area back onto the other side.
Add a Camera
Select the ![]() Camera from the Tools pane. Move the green target icon into the centre of the playing area, where the player is, and click to place the camera.
Camera from the Tools pane. Move the green target icon into the centre of the playing area, where the player is, and click to place the camera.
All the defaults for the camera should be good. The camera will be positioned 200 units back, which should be a good distance. We don’t need the camera to move or track the player and so we can just test the level and see the new camera in action.
Improve the Game
Add smaller boulders (scale them down) and make them faster by creating a new Movement Definition type (Copy the Axis Movement Definition, give it a new name, and increase the Max Speed).
Add an NPC Generator that spawns an enemy ship that can fire at the player. Try new [[AI Tab|AI behaviours, such as setting the ship to chase the player or perhaps use Move Random but set the Min and Max change direction values to 2 and 5, and use an Area Action of Destroy Self.
Add thrust to the ship (in the Input Definition).
Add movement to the background. Make it slowly rotate.
Speed up the rotation of the ship (in the Movement Definition).
Add thrust particle effects.
Add Post Processing effects in Level Settings
Add a shield
Add Hyperspace
Spawn asteroids that take 2 or more shots to destroy by changing the health and projectile damage.
Add upgrades to fire multiple shots or higher-powered weapons.