Building the Vertical Shooter Template
From Shoot Em Up Kit
Templates
This tutorial explains how we built the Vertical Shooter template. The template is included ready-made in the Shoot 'em Up Kit and you can create a new game using it as a starting point.
Build the Game
Create a new Empty Project
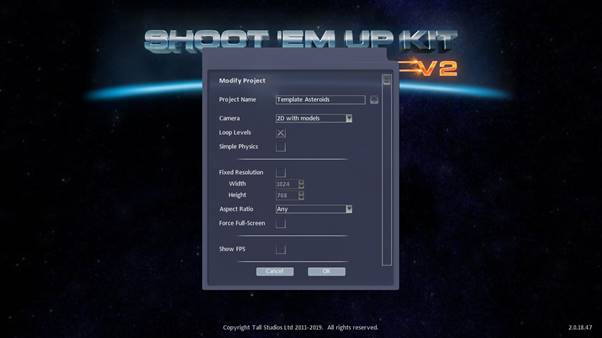
Give the project a name.
Select 2D with models
Click the OK button to create the project.
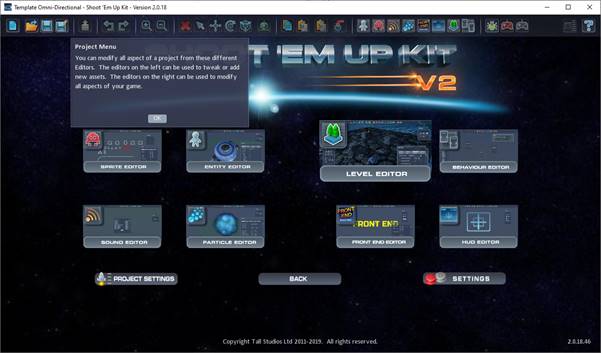
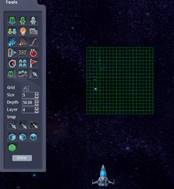
Select the Level Editor
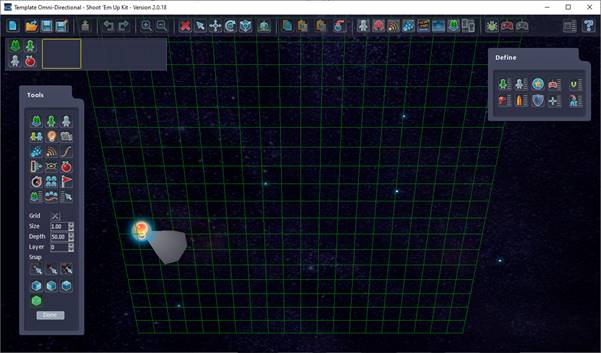
The scene is empty except for a single directional light. A grid to help visualise the area is shown. Because we selected to create a 2D game the objects we place will be placed on this plane by default.
Placing the Player
Add a Player by clicking the ![]() Player icon on the Tools Menu. Select Sci-Fi Ship 05 and place it in the level.
Player icon on the Tools Menu. Select Sci-Fi Ship 05 and place it in the level.
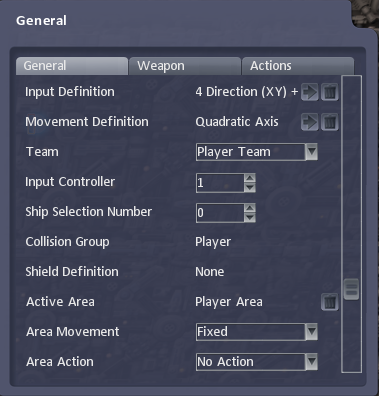
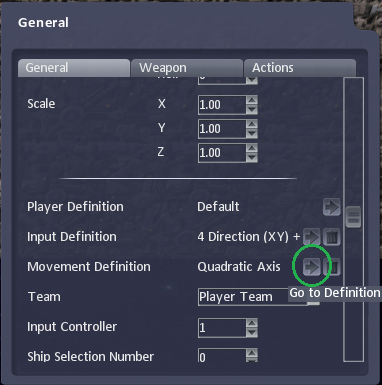
In the Properties window:
Click on the Input Definition, where it says None.
Select 4 Direction (XY) + Fire and click the OK button. This will allow the ship to move in 4 directions (Up, Down, Left and Right) and Fire too.
Click on the Movement Definition, where it says None.
Select Quadratic Axis and click the OK button. This will allow the player ship to move with a subtle speed-up and slow-down as the player moves and releases the controller axis.
Creating the Background
Layers
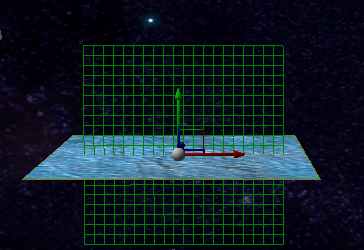
To create the background, we will use layers. Layers are a simple way of adding items at different depths in the scene and are selected on the Tools Menu. The 2D with models game mode still uses a 3D scene and so it is possible to have items closer or further away to the camera.
|
|
| Layer 0 | Layer 4 |
The distance between layers can be adjusted using the Depth property on the Tools pane.
The current layer is set using the Layer property on the Tools pane.
For our 1942 style vertical shooter we will use 3 layers:
Layer 0 will be for the gameplay. The player ship, enemy and bullets will all be on this layer.
Layer 1 is slightly further away and so we will use this for clouds.
Layer 2 will be our ground/sea level.
Placing tiles
Select Layer 2 on the Tools Menu.
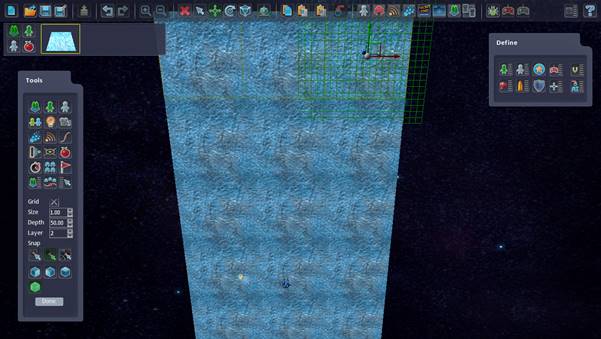
Add a ![]() Scenery item. Select a water effect tile and place into the scene.
Scenery item. Select a water effect tile and place into the scene.
In the Properties Window set the pitch to 270 to make the tile vertical.

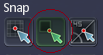
In the Tools Menu select Snap to Grid
We will now start filling the level with background tiles.
Copy and Paste Clone
With the background tile selected, click the ![]() copy button on the Tool Bar. The
copy button on the Tool Bar. The ![]() Paste and
Paste and ![]() Paste Instance (Clone) buttons will now become active. Click the Paste Instance button to create a copy of the tile. Because we selected the Snap to Object button the tile should align next to our original tile when you move it close.
Paste Instance (Clone) buttons will now become active. Click the Paste Instance button to create a copy of the tile. Because we selected the Snap to Object button the tile should align next to our original tile when you move it close.
We use Paste Instance because a clone object takes all its properties from the original. If we wanted to change the background in any way then we can select the original tile, make the change, and all the cloned tiles will be updated.
Paste a clone to the other side of the original tile so that we have three in a row.
Select all 3 tiles using CTRL+LeftClick on each of the tiles so that they’re all highlighted. Select ![]() Copy and then
Copy and then ![]() Paste Instance. Three new cloned tiles will appear and can be snapped above the original set of tiles.
Paste Instance. Three new cloned tiles will appear and can be snapped above the original set of tiles.
We can repeat this to quickly and easily fill the level with background tiles.
Set the Camera
Create a new camera by clicking the ![]() Camera icon on the Tools pane and place it near the player’s starting location in the level. You will see a green icon showing where the camera is targeting and you may also see a yellow model of the actual camera location.
Camera icon on the Tools pane and place it near the player’s starting location in the level. You will see a green icon showing where the camera is targeting and you may also see a yellow model of the actual camera location.
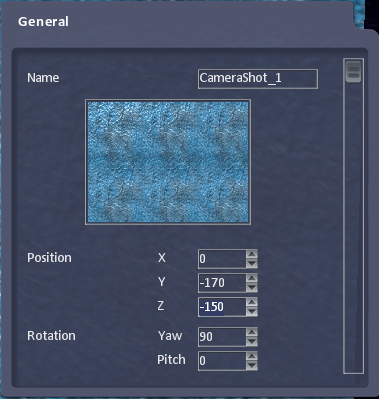
We can set the camera to follow the player or any other in-game item. For a classic vertical-scroller game we needn’t do this as the player can move around the screen independently of the Camera. However, we could use the tracking feature to ensure the camera remains a fixed distance from the player.
Clicking the Tracking Entity property will allow us to select which item the camera will follow. Select Player_1 from the list. Some new options will appear in the General properties window.
We can set the Tracking Distance property to control how far way the camera will be from the Entity.

We will set the Tracking Style to Fixed Direction. This will leave the camera pointing in a single direction, which is very common in side-scroller games.
We don’t need to set any Target Offset values because we are using a fixed direction.
Moving Camera
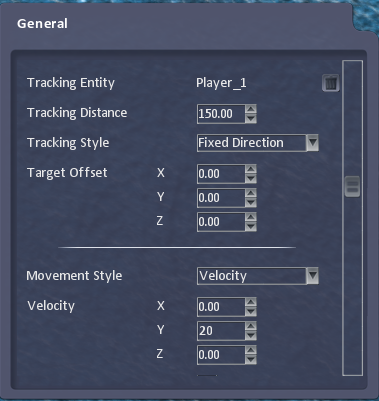
Vertical-scrolling style games are often set in a constantly moving level. We can achieve this by setting the Camera to move at a constant velocity.
Set the Movement Style property to Velocity; and set the speed in which you’d like the camera to move using the Velocity X, Y and Z properties.
Add an Active Area
We are now going to add an area of the screen that the ship can move around in. The player will be able to move around freely in this area. We will also make this area move upwards (the +Y axis) at a constant velocity so that the player will always be travelling along the level but still be able to move freely within the active area.
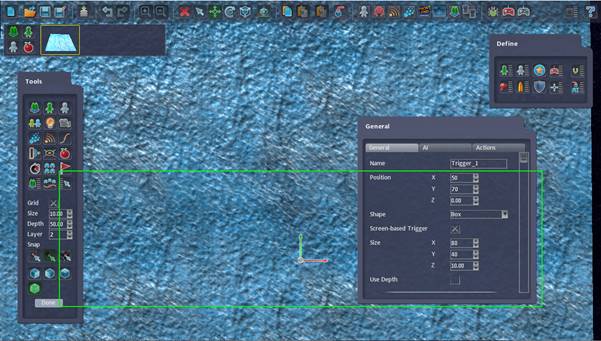
Add a ![]() Trigger. A sphere will appear. Place the sphere anywhere on the map and the Properties window will open.
Trigger. A sphere will appear. Place the sphere anywhere on the map and the Properties window will open.
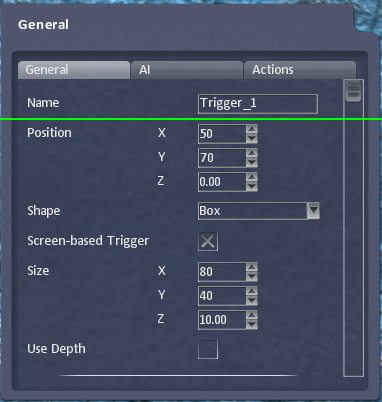
Set the Shape to be a Box.
Set the Name to Player Area.
The Position and Size properties are set as a percentage of the screen. We will allow the player to move within 40% of the screen width and 80% of the screen height.
Set the Position X to 50, which is the centre of the screen, and Position Y to 70, which is a little way into the bottom of the screen.
Set the Size X to 80, to give a lot of movement along the width of the screen, and Size Y to 40.
Select the Player ship again. You can either click the ship or use the ![]() Select Item option on the Tools Menu to select it from a list of all items in the level.
Select Item option on the Tools Menu to select it from a list of all items in the level.
In the General properties window, click Active Area to open a list of areas. The Player Area which we’ve just created will be in the list. Select the Player Area and the window will close and we’ll get two new options for our Area.
Leave the Area Movement property as Fixed because we want the area to remain fixed to a region of the screen (because we set it to be a screen-based trigger). The level will scroll by, but the player will always be constrained to the 40% of the screen width and 80% of the screen height.
Set the Area Action property to Stop so that the player ship will stop if it reaches the limits of the active area. We could have the player wrap-around the area, or bounce off the edge, but classic vertical scrollers simply make the player stop at the edges of the active area.
![]()
Automatically Moving Player
The Player is free to move around within the active area and will be pushed forward if the player ship reaches the back ‘wall’ of the active area. This method is used by some vertical scrollers.
Another option is to automatically move the player upwards at the same speed as the camera. We can do this using the Player’s Movement Definition.
Select the Player ship by clicking it or using the ![]() Select Item option on the Tools Menu
Select Item option on the Tools Menu
On the Movement Definition property, which we set to Quadratic Axis earlier, click the Go to Definition arrow.
The Quadratic Axis definition will open.
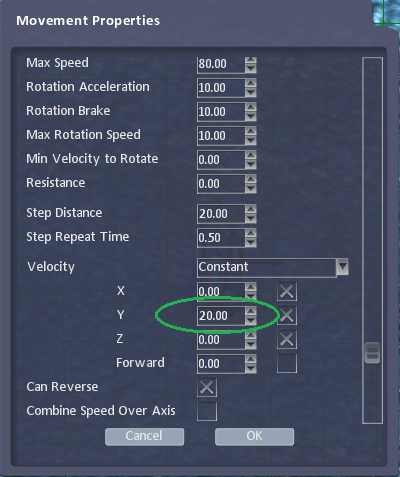
The Velocity type is already set to Constant, which will provide a constant velocity force to any item this definition is applied to. In this example, it is the player ship.
Change the Velocity Y value to 20, which will match the value we set for the Camera.
Click the OK button to close the window.
A list of all the Movement Definitions will open. Close this list as we don’t want to work on any other definitions.
Test the Game
Click the ![]() Test Game or
Test Game or ![]() Test Level icons on the Tool Bar to test the game.
Test Level icons on the Tool Bar to test the game.
The player will now be moving at the same speed at the camera and so will not need to be constantly moved forward using a controller.
The player can move around within the bounds of the active area and the player can fire.
The player and camera will move slowly along the level.